Archive for the ‘Organizing’ Category

More Kitchen Organization

So.. Week #4 of the Weekly Cleaning Challenges at A Bowl Full of Lemons was Kitchen Organization.  In the 21 Day challenge she did a few different areas of the kitchen, but wanted us to share any further areas of organization that we wanted.

I was so excited to see that Toni uses Tupperware brand containers in her kitchen.  I thought that with how awesomely organized she is, she must know about the real Tupperware brand containers called Modular Mates.  I actually started selling Tupperware because of these modular mates and because of the Fridge Smart containers (keep fruits and veggies for waaaaay longer in the fridge.)

I keep my spice packets in a mini rectangle modular mate.

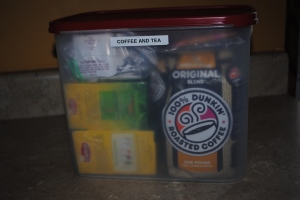
I keep my coffee and tea in a rectangle modular mate number 4.

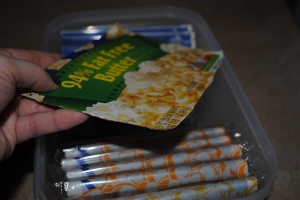
I keep popcorn in a rectangle number 2 because it fits perfectly.  I just cut out the front of the box to my less fat version popcorn to keep the two kinds separate in the box.

I keep hubby’s breakfast drinks in a basket, but they would fit perfectly in a rectangle number two as well.  I use the basket because hubby likes to be able to just reach in and grab a packet in the morning.

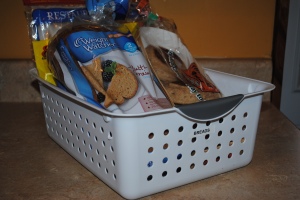
We keep breads (tortillas, pitas, english muffins, bagels, bread) all in a bin on top of the fridge.  We used to keep everything loose on top of the fridge and I would end up getting on a stool and seeing that we had four different quarter loaves of bread up there.  The basket is so much easier to grab the whole thing down and see what we have.

I use modular mates in the snack cabinet too.  I know that this cabinet holds rectangular modular mates (they fit from front to back of the cabinet perfectly) and I can fit up to a six high level.  They don’t make six high level, but this means that I can fit two number twos and two number ones. 2+2+1+1= 6.  Get it?  All modular mates work like this.  LOVE it.

That is a number five super oval modular mate with crackers in it.  See how it is one short container shorter than the stack of six?

I posted before my other cabinets of pantry stuff that I also use modular mates.  I prefer the super ovals and rectangles because they are about eleven inches deep and go from front to back perfectly.

My other secrets for organization are extra shelves.  They have the wire racks that are great for letting you use up the height of each cabinet.  I use these in a few cabinets like this one with pans in it.  I can separate the cookie sheets, muffin tins, cooling racks, and cake pans on the top from the pie plates, bread pans, and toaster oven pans on the bottom.

The second way to add extra shelves is one that many don’t think of.  You can go to a home improvement store (we went to Lowe’s) and get big long shelves already treated and ready to go.  You then buy extra pegs that hold the shelves (Look at the inside of your cabinets.. they have extra holes for moving shelves… use them to add more shelves.) and have the shelf cut or cut it yourself.  I added extra shelves to just about every cabinet in the kitchen.  They come in a few wood colors and white.  Mine don’t match exactly, but they are close enough for the price and how happy they make me.  The link to my other post with pantry cabinets shows how I added extra shelves to my can cabinet to fit the can heights.  No more toppling cans.

This board is at Lowe’s for $10.46 for 36 inches by 16 inches.  Then they have longer ones if you need more or different sizes.

Real Organized 36"L x 16"W White Melamine Shelf BoardSo… those are my extra kitchen organization tips or ideas that I like.

I don’t really do much for parties right now for Tupperware anymore, but am still considered an active consultant so… feel free to visit my Tupperware site and browse what they have and order from my site, of course.

Home Management Binder

Week #1 at A Bowl Full of Lemons was to make a Home Management Binder. I sort of had this started already, but the sections were found in different areas.

I keep a notebook on the bar at all times to jot things down- projects, meal ideas, sale and coupon matchups, to do lists, things I want to do or get for the house…etc.  I also had a binder a while ago that I would keep the plans for the addition of our house and all of my gazillion ideas for decorating that, the budget info., and some gardening stuff.

I was using the notebook lately for making up my weekly menus, but that was getting pretty unorganized and confusing.


This is the new Home Management Binder.  I included tabs for Menu Planning, Gardening, New House, Decor/Crafts, Cleaning, and Budget.

I made up these charts for helping me plan my weekly menu.  I actually saw a similar layout somewhere else, but this one better fits the way that I plan.  I have a second page behind these for my list of meals that I want to have again or try.

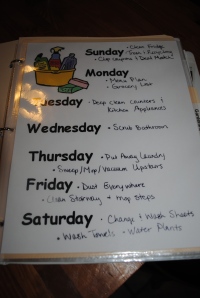
This is the cleaning chart that I made.  I have one printed out and laminated that I keep on the side of the fridge for quick glance.  I put one in here in case I need to check it out when I am looking in my binder or if something gets erased (I have everything written on the chart with dry erase for now).

The gardening section has info. on crops that I have grown that I printed out here.  They have planners, guides, and great information on the crops that you put in.  I also have sketched out plan for crop placement so that I know how to rotate them the next year.  I use a lot of information by Mel Bartholomew that does Square Foot Gardening.  He has a site and a few books.  Check your local library for the books.  You can learn the basics and return the book.  I know our local library has his books.

We also try to plant at least a tree a year since we have lived here.  I made a really junky drawing on regular lined paper with dots as to where we put the tree, what kind it is, and the date that we planted it.  I just thought that it would be neat to have this info later on.

I also keep sketches of flower bed layouts that I have had or like and magazine clippings of inspiration.


This year I will be adding a section for CSAs.  I want to keep track of what we get, how much, and when to give me an idea for future years.

I made up some new sheets of photos that include inspiration from other rooms that I have seen combined with photos of things that I already have and want to include in the room.  Our addition project is quite involved.  We will have five new bedrooms and a new living room.  A wall in the now house will come down combining our tiny used to be dining room now play room with our tiny now living room to make one big nice new dining area. (confusing? sorry..)  We have a ton of stuff that we had or have gotten for when the house is done, but can’t fit in here now.  I have to use photos to remind myself.

Recipe Organization


I have a button on my blog for doing the Weekly Challenges over at A Bowl Full of Lemons, but have yet to post any.  It is week three and I finally made some progress.

This week the challenge is to make a recipe binder.  Go here to see Toni’s post.

I have many of my recipes organized online in a favorite folder and I add to that folder constantly.  I look up new recipes almost every week and end up finding a few to add.

I also have a stack of cookbooks that I borrow from the library based on what my interest is at that particular time.  Right now I have a few of Weight Watchers cookbooks that I was flipping through.

My grandmother got me a subscription to Everyday Food magazine that I grew to LOVE.  I was keeping all of those and I would just write the main topics or great recipes that I wanted to use on the back of the magazine and then folded the corners over.

I have quite a few cookbooks that I own as well.  I keep my favorites in a cabinet near the stove and then use little sticker tabs to mark the recipes that I want to try or use.

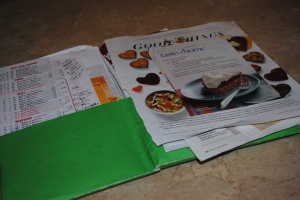
I then had this ugly old green folder that I have jammed recipes in that I have printed or ripped out of somewhere.  It was in really bad shape and was impossible to find anything that I needed.  I went through it about a year ago and separated sweets from meals, but with only two sides of the folder that was as good as it got.

I found a binder that I had lying around (I plan to replace this ugly plain black one with one of the plastic sleeve ones so that I can add a cute cover like Toni did.) and go to work emptying my folder and organizing the categories.

I came up with Breakfast, Chicken, Pork, Beef, One Dish (casseroles, mac n cheese, crockpot), Sauces/Marinades, Soups, Sides, Appetizers, and Desserts.

I used an idea I saw on one of the other posts to use manila folders cut in half for the dividers and used my label maker for the categories.  I had some plastic sleeves that I slipped all of the recipes into and added a sheet of card stock to the pages where there were little clippings or recipes cards that needed to be affixed to the paper.

I still want to make the pretty cover and many of the recipes really need copying over more neatly, but for now…. I am just proud of myself that I got it done.

The binder doesn’t fit where the folder used to, but I will be able to find the recipes that I want without wasting my precious time searching for them.

I also plan on printing some recipes from my favorites online file that I have tried and love.  If I know that I will make them again I might as well print them where I can keep them near the stove.

A new tab might also be added for my more health conscious recipes that I have found lately from Weight Watchers and a new diet that I have been reading called Cinch.


Magazine Holders Homemade

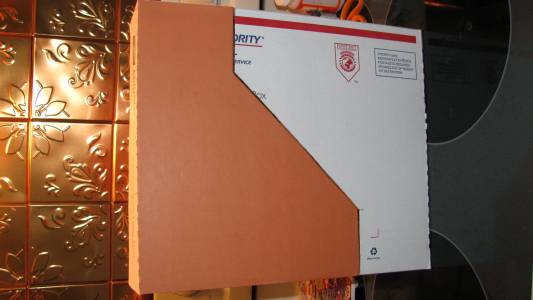
I saw this post here at A Bowl Full of Lemons and decided to try a set and see how they came out.  I have looked all over at magazine holders and to get one that is fully enclosed and doesn’t have the cut outs in it the cheapest I found was about $5.99 each.  This set of two, however, was FREE.  I had scrapbook paper and rubber cement.  I even had the box leftover in the set that I requested from the post office around the holidays also for FREE.

You use one medium flat rate usps box and measure four inches up and three inches in to make the cut out area.  Then you connect that line with the one you make on the other side and draw the diagonal line using a ruler.  (See the link to actually see better what I am trying to say.. please…)

I got these packs of scrapbook paper at the dollar store.  My dollar store called Real Deals has scrapbooking packs like these with 40 sheets in them for a buck!!!  Both of these came from those packs.

The scrapbook paper works really well because these boxes happen to be 12 inches wide.  I just cut the end pieces with a little hang over and put those on first so that it covered the corners when I put the sides on.

Toni used wrapping paper and made hers all the same colors and added labels…. and are WAY cuter than mine, but…. It is a start and now I know when I have room I can make my own.

Thirty-One Gifts Giveaway and Info.


I LOVE Thirty-One Gifts.  One of my favorite blogs A Bowl Full of Lemons just posted how she uses some of the organizing totes from them and she is also doing a giveaway!!!  Yippie!

So… go here to check it out and enter the giveaway.  I guess the new Spring catalog just came out yesterday too… so…. check out the new stuff.  I am loving the new Lil’ Expressions bags that you can add the little personalized people.  I want to get one with all three kids on it.

I also have to plug my girl Lindsey who sells Thirty-One Gifts.  She is the consultant that I use here locally, but is not the consultant doing this giveaway.

Cleaning Chart


I made up this cleaning chart this weekend.  I have had a list for a while now, but had it on a paper stuck in my notebook that I keep on the counter.  I got this idea from some blog out there in blogland (sorry that I can’t give you credit.. whoever you are) and it has really helped me.

There are days where I would feel like I didn’t have time to clean because I felt that if I started I needed to clean the entire house at once.  This would make me decide to only do the everyday cleanup and upkeep and not tackle any of the extra cleaning that needs to be done weekly.  I would then be stuck with one whole day where I would need to bust my butt getting the house all done.  This day would usually end up being on the weekend when my hubby was actually home and I would be cleaning away instead of cherishing some rare family time.

Now I do the thing that is on that day along with the everyday stuff like dishes, cleaning counters, and keeping floors clean.  It isn’t overwhelming and I know when I tackled that task last.

Yes… sometimes I am too busy to get to that thing that day, but it is only one or two small tasks to be added to the following day if I fall behind.

I love this idea… and it is working for this busy mom.

Organizing Challenge-Day 16 Fridge

Soooo….  Day 16 of the Organizing Challenge over at A Bowl Full of Lemons is the fridge.

I go through the fridge at least every single Sunday because it is the day before the garbage guy comes.  I take all the yucky food out and either trash it or give it to the chickens.  I thought that because I do this…. the fridge couldn’t be all that bad.  I must be able to hurry and get this done while I had at least one child napping, one playing alone pretty good momentarily, and one starting to fall asleep in her swing.

Ok… all together now…. “Yeah right!!!”


I decided to try and do the take everything out thing, but only sections at a time just in case something came up and I was unable to continue.

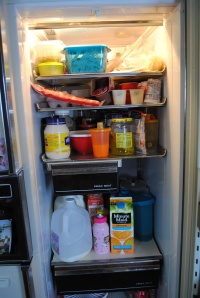
Here are the before pics….

I am not sure which is more embarrassing….. that the inside of my fridge looks like this or that my fridge is circa 1980 and we bought it used about five years ago.  We were  newly weds with a ton of student loans building a house…. we needed cheap… so… here it is.

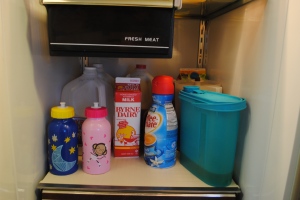
Anyway… the third pic is from an angle trying to show you that I already went label happy in here and tried to organize the fridge into categories.  This makes me feel better, but also helps with the hubby’s “where’s the….” questions.

Ok… so.. I have a ton of pics… so I will keep the writing to a minimum… try to anyway…

Here are the during and afters….

Section one done.  And…. screaming child……  break….

Section two done.  And…. hungry small people…. making dinner… screaming smallest child…. waking middle child… hubby home…  etc… etc……

Day two.. this morning……

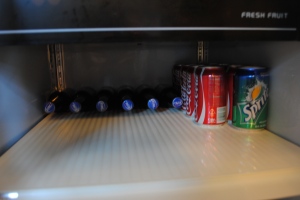
We never buy soda to just keep in the house… but I had a coupon that I used to have soda to offer guests at our daughter’s birthday party this past weekend.  This shelf is usually reserved for Daddy’s beer and any larger leftovers or dinner making materials.

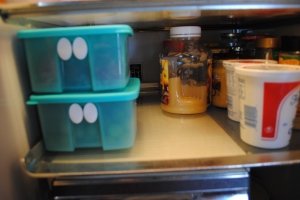
This is before and after of the fruit drawer.  I had just went shopping and didn’t have my produce in the fridge smarts yet.  I need to find some sort of divider or container for the apples and oranges.  Until then.. I am putting the fruit fridge smarts on the shelf so that I don’t have to fight the apples.

A little plug for Tupperware…..  This is why I started selling Tupperware last year…. to get free stuff… and I thought these were amazing.. and still do.  I am going to slide out of the selling Tupperware thing… but am still a consultant as of right now… so feel free to contact me if you have any questions.. or orders of course. 😉

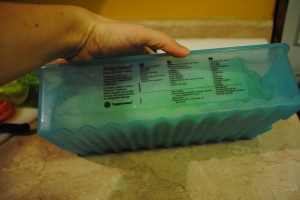
These are fridge smarts and they have ridged bottoms, valves, and charts on the sides.  The new ones are clear and have a picture chart for how to set the valves to high, med. or low for humidity.  These keep your produce fresher for soooo much longer.

This thing on the right is Tupperware too.  This one is the mini forget me not.  They have bigger rounded ones like this and squared ones to hold sliced cheese or anything that fits really.  They are awesome if you use them right and don’t let them get pushed to the back.  They hold a half onion or tomato… whatever… and then you hang it off the side of the shelf so it is in plain view and you don’t end up with a soggy half tomato in the back of some drawer getting stinky.

Okay.. done with plugging my Tupperware obsession.

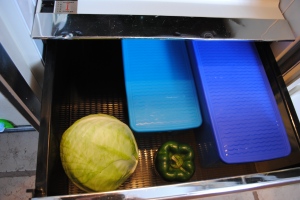
Veggie drawer—

And.. the door.  Yes.. we have way too many open bottles of bbq dippy stuff.  My kids and husband (and I .. really) love to dip our meat.  I decided to wait until hubby got home to discuss which go.


TV Cord Basket


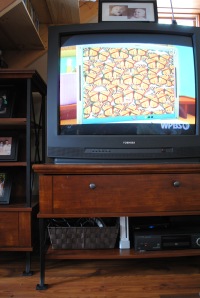
I finally found a basket that was on sale for $12.99 (still much more than I wanted to spend.. but baskets are expensive) that would work for on the shelf under the TV.  I wanted something so that I could get the cords from under the TV up off of the floor.  We keep a lot of the kids puzzles, play dough, and craft stuff on shelves that hubby made right above the TV that is tucked under the stairs.  If anything falls while getting something out or putting it back…. it is basically gone forever because of the nasty mess of cords and dust bunnies.  (I put the basket there already to make sure that it was going to fit and be tucked back enough to not show all the nasty cords.)


Now I get right under there to sweep and mop.  No more dust bunny collection and much easier to find something if it gets dropped back there.


Organizing Challenge Day 15

Today’s challenge is medicine and vitamin storage (over at A Bowl Full of Lemons).  After my super huge post of spending hours on Sunday organizing the bathroom… I am sooo glad that this is super short and sweet.

Before-


After-

I moved one recipe paper from jammed in on top to the green folder.  I also pushed my every day meds way left and others to the right.

Big whoop!  😛

I guess I could get one of those skinny silverware bins to put my everyday stuff in.  It would make it a bit easier to take in and out.

I keep my every day vitamins, hubby’s and the kids in this cabinet in the kitchen.  I also keep the regular headache and heartburn meds in there for easy access.

The other shelves hold cookbooks and extra fruit and jello cups that don’t fit in the fridge.

To see the rest of my medicine storage see my post on the linen closet that is in my combo post of days 4, 10, 13, and 14.


Organizing Days 4, 10, 13 and 14

Okay… so… I have been putting off this post a bit… first because I couldn’t get to doing the actual organizing.. and then because I knew it would be a bit lengthy.  I am going to try and keep it mostly pictures.

A Bowl Full of Lemons is doing this organizing challenge.  I missed day 4 because it was the linen closet and if I was going to do that… I would need to do much more than arrange a few towels. (You will see soon)  Day 10 was the laundry room, day 13 was the medicine cabinet, and day 14 was under the sink.

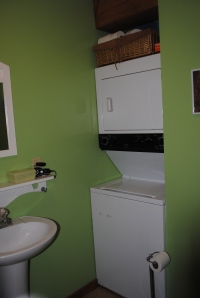
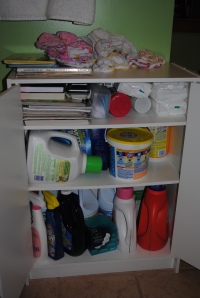
Well….  This is my “laundry room.”  We have a stackable unit in the bathroom and a small cabinet in there too that holds all of the detergents and stain stuff.

Note—  I am going to post about my horrid bathroom color later.  I took on the project of repainting it from blue to green while in the end of my pregnancy.  I was nesting and in a hurry and went with a color that, after I got it, I really didn’t like.  It was supposed to be a much softer, more brown toned green.  It came out neon-ish freaky bright green.

Anyway–  I bought deep brown spray paint to paint the wicker basket on top of the dryer that holds the extra toilet paper.  I am also going to pain the clock in the bathroom with the same paint. (I am sure that will be a post later)  Other than the basket there is a just a box of dryer sheets up there.

The closet is a bit of a mess.  I was keeping my daughter’s underclothes on top because of the multiple accidents at first.  It was quicker than running upstairs every time.  There are extra baby wipes, clorox wipes, multiple things of detergents and stain stuff, and some magazines and books that I was trying to keep from getting destroyed by kids.  It only makes us never read them because they are in the cabinet.

I took the unders upstairs and tossed or gave the extras.

This is the after of that cabinet.

Not huge… but better.

We don’t have a medicine cabinet or an under sink area.  There is just a pedestal sink and a mirror.

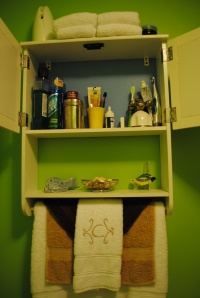
We do have this cabinet hanging over where the toilet and laundry cabinet are.  Not too much to organize so I just straightened it.  Here is a before and after.


As for the linen closet.  We have one big closet in the bathroom which holds our towels, medicine, toiletries, extras, medicines, and some. I keep our few sheet sets in a bin under the bed and the kids sheets stored in their rooms.  We also have a utility closet that has the hot water heater, but I had hubby put some shelves in there.  He actually had the fabulous idea to order the shelving unit for the inside of the door too.  I am a couponer… so I use this area for the extras and stockpile mostly and the bathroom cleaning stuff.  The temperature gets a bit crazy in there so I try not to put anything aerosol in there.

This is the before of the linen closet.

This closet has a big area on top that goes up and in.  You can’t really see great in the pics, but I have bins stacked all up in there.  This makes it hard to get to the ones at the top, as well as, the ones on the bottom.  I tried to be organized, but since they are so hard to get to it just made  me not use any of the stuff up there.  I decided that if anything has been up there forever and I haven’t taken the effort to dig it out…. I am tossing or giving it.

The bottom of the closet (looks like cotton batting) is the dishwasher that comes into the bathroom from the kitchen.  It is how we made room for a dishwasher.

This is what it looked like after I took out the front half of the stuff.  The picture on the left doesn’t show that there is one more set of bigger bins under those eight because of the angle.

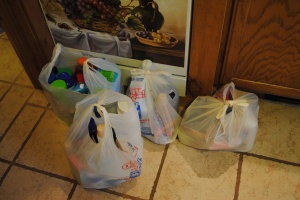
I swore I took pictures of the floor covered in junk and empty bins, but I guess I just thought I was going to and got side tracked… go figure.  I did get this pic of the bags of stuff that I could give away.  I gave four grocery bags of stuff and filled an average kitchen garbage bag with garbage.

I used to have these bins—  soap, toothpaste and brushes, sunscreen, bugspray, waxing, shoe polish, bandaids, hair coloring (which I have only done the once), meds- pills, meds- cough, lotions, kids meds, and the big bin had a bunch of random lotions and potions stuff that didn’t fit anywhere else.  I also have the two baskets that hold all sorts of random stuff that I use more often.  I had a big spot on the shelf for my every day stuff that needed to be moved one by one every time we needed a new toothpaste.  I use two small caddy things that were meant for the office for my make up.  I got those at the dollar store.

Here are the afters of the linen closet.

It doesn’t look like a ton of difference in the pics, but I assure you I got rid of a ton and it feels much better.  You can see at the top of the first and in the third pic that the bins are only three high now instead of the five before.  The second pic shows that I put all that loose stuff in a bin on the left so that we can more easily access the bins in the back when we need to.  The last pics shows that there isn’t a leaning tower of crazy in the back.  I still keep my “decorative” towels in the back left and then the back right now has a bin that is holding the baby towels, baby washcloths, and burp cloths.  The front bin is all washcloths- adult and kids.  My kids are freaks about having dirty hands and napkins don’t do.  They need their hands washed with a washcloth after every snack and meal.  That is why I have a ton of them.

UGH… I’m exhausted… anyone still there???

One more set of before and after… and I am done for this post.  I just saw that today’s challenge was posted and is meds and vitamins.  I can use part of this one for that at least.

The last part of the bathroom that took me hours on Sunday while hubby was home…. is….. the utility closet.

Before—

After—

Excuse the super blurry picture, but my (way too expensive) camera was knocked to the floor at the birthday party Saturday.  ugh…

On a happy note- see that empty spot on the shelf!!!

The top shelf has a bin behind there with all of the other cleaning stuff in it.

And that empty shelf…..

I used that up to get the beach towels and my hair dryers/curling irons out of the leaning tower of towel area.

The end… finally…..